Once you choose your flooring, you need to measure the room. It’s easier to measure most spaces if you have two people – one to hold each end of the measuring tape.
Measure the length and width of the room. Multiply these two numbers together to get the square footage or square metres required.
Use the square foot or square metre numbers on the packaging of your chosen flooring to decide how many boxes you need. Divide the number on the box into the total square footage or metres for your room. Do the same for the underlay rolls. When you purchase the flooring, round the number of boxes up rather than down.
Tools required
- Measuring tape
- Pencil
- Straight edge or set square
- Saw
- Piece of 2 x 4 scrap lumber approximately 2 ft long
- Hammer
Prep the floor
1) Remove any old carpeting, underpad or loose tiles. You may also want to remove your baseboards if there isn’t enough room for the floor to slide under them.
2) Sweep or vacuum the floor thoroughly to remove debris.
3) Hammer down or remove any staples or protruding nails.
Lay the floor
1) Lay out one length of underlay.
2) Roughly trim it to the length of the room – leave a bit extra at each end of the line. A couple of inches is fine.
Note: Laminate flooring needs to be about 1/2“ or 1 cm away from the wall on all edges to allow for expansion and contraction. Do not fit it tightly – it may buckle over time.
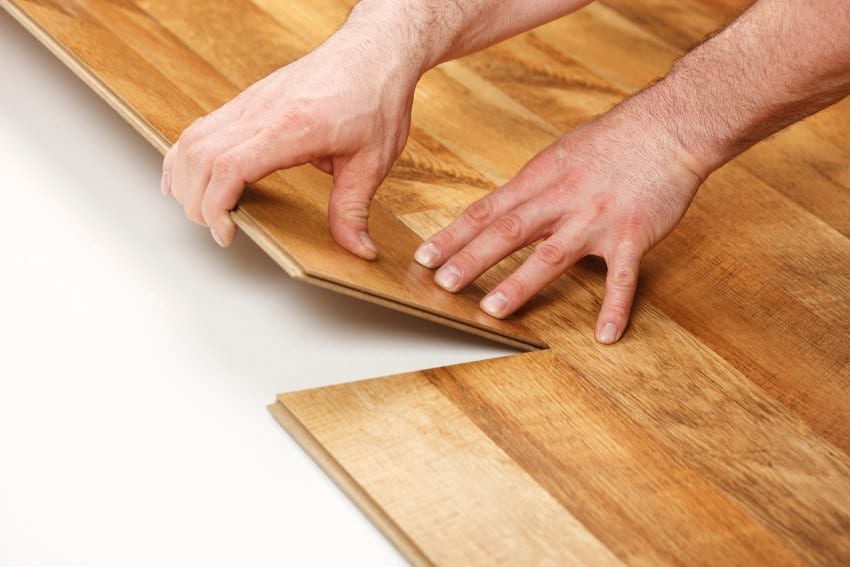
3) Starting at the wall edge, place the first flooring board down against the wall. The groove should face you.
4) Place the next board at the end and click the tab on that board into the groove. Continue the length of the wall, stopping to measure when you can’t put down a full board. Measure the distance to the wall and mark your board. Make sure that you measure the board from the end that clicks into the previous board. Check your measurements, and then cut your board.
5) Click the last piece of the first strip into place.
6) Use the piece that you cut off to start the next row. This ensures that the joints are staggered, resulting in a stronger floor that looks more like hardwood.
7) Insert the tab of the next row into the groove of the first row. Gently press down to “click” the floor board into place. You may need to use the scrap 2 x 4 and a hammer to get the boards to seat tightly as you move along the floor. Make sure that you place the edge of the 2 x 4 lengthwise along the boards to distribute the force evenly.
8) As you move across the floor, lay additional lengths of underlay, sealing them together with the peel and stick edges.
9) At the final edge, you may need to cut the boards lengthwise to fit. Measure carefully at each end of the gap, mark and trim them to fit. Remember, your walls may not be exactly straight.
10) Replace the baseboards if you took them off.
Once you’re done, sweep your floor to remove any dust, and stand back and admire your handiwork!
Need help completing your flooring project? If the DIY route doesn’t fit into your busy lifestyle, remember that Holmes Flooring is always available to provide free in-home estimates for your upcoming project. Just fill out our contact form to get the process started.