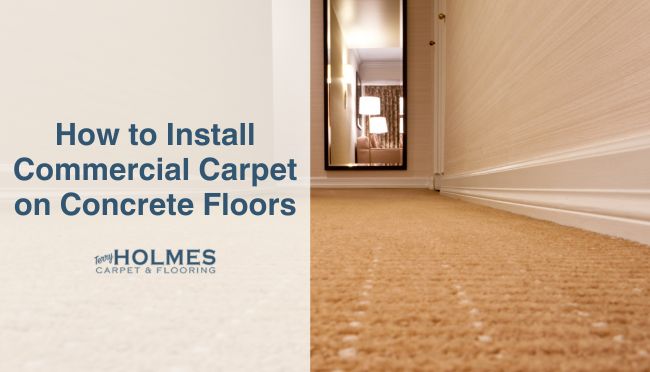
Installing commercial carpet over a concrete floor can transform a space, adding warmth, reducing noise, and improving the overall aesthetic. Unlike residential carpet, commercial-grade options are designed for high-traffic areas, offering superior durability and resistance to wear and tear. This makes it an excellent choice for basements, offices, retail spaces, and workshops.
While the thought of laying carpet on concrete might seem daunting, it’s a manageable DIY project with the right preparation and guidance. This step-by-step guide will walk you through the entire process, from preparing your concrete slab to making the final cuts. We’re here to break down this complex project into simple, actionable steps to ensure your success.

Tools and Materials for Your Project
Before you begin your DIY carpet laying project, it’s crucial to gather the right tools and materials to ensure a smooth and professional-looking installation. Some basic tools you’ll need include a utility knife, a carpet stretcher, a knee kicker, a measuring tape, and a staple gun. Don’t forget materials like carpet adhesive, tack strips, and underlay for added comfort and durability.
Having all your tools and supplies ready beforehand will prevent interruptions, minimize frustration, and allow you to work more efficiently from start to finish. Proper preparation is the key to achieving a polished result that transforms your space.
| Category | Item | Purpose |
| Preparation | Concrete Patch/Leveling Compound | To fill cracks, holes, and level uneven areas. |
| Shop Vacuum | For thoroughly cleaning the concrete surface. | |
| Scraper | To remove old adhesive, paint, or debris. | |
| Moisture Test Kit | To check for excessive moisture in the concrete. | |
| Measurement & Cutting | Measuring Tape | For accurate measurements of the room and carpet. |
| Chalk Line | To create straight guidelines for cutting and placement. | |
| Utility Knife with extra blades | For cutting the carpet cleanly. | |
| Straight Edge or T-square | To guide your utility knife for straight cuts. | |
| Installation | Commercial Carpet Adhesive | To glue the carpet directly to the concrete. |
| Trowel (with specified notch size) | For applying the adhesive evenly. | |
| Knee Kicker | To stretch the carpet and ensure a tight fit. | |
| Seam Roller | To press seams together for a less visible finish. | |
| 75-100 lb. Carpet Roller | To press the carpet firmly into the adhesive. | |
| Safety | Knee Pads | To protect your knees during installation. |
| Work Gloves | To protect your hands from adhesive and rough carpet backing. |
The Installation Process: A Step-by-Step Guide
 With your tools and materials gathered, you’re ready to start installing your new commercial carpet. The following steps will guide you through the process, from preparing the subfloor to laying down the final piece. For the best results, it’s crucial to follow these instructions carefully and work methodically.
Step 1: Concrete Floor Preparation
Proper preparation is the most critical part of the job. A clean, dry, and level subfloor ensures the adhesive will bond correctly and your carpet will lay flat without bumps or bubbles.
- Clean the Floor: Start by thoroughly sweeping and then vacuuming the concrete with a shop vacuum to remove all dust, dirt, and debris.
- Scrape the Surface: Use a floor scraper to remove any paint drips, old adhesive, or other substances stuck to the concrete. The surface should be as smooth as possible.
- Check for Moisture: Concrete is porous and can hold moisture, which can ruin your installation. Use a moisture test kit to check the levels. If moisture is high, you may need to apply a moisture barrier or sealant before proceeding.
- Repair and Level: Inspect the floor for cracks, holes, or uneven spots. Fill any imperfections with a concrete patch or leveling compound. Allow it to cure completely according to the manufacturer’s instructions, then sand it smooth.
Step 2: Acclimate the Carpet
Bring the rolled carpet into the room where it will be installed at least 24-48 hours before you begin. This allows the material to adjust to the room’s temperature and humidity, which helps prevent it from shrinking or expanding after installation. Unroll it if you have space to help it relax and flatten out.
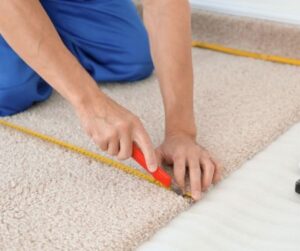
Step 3: Measure and Cut the Carpet
Measure the length and width of your room carefully. Add about 3-4 inches to each measurement to allow for trimming. Roll out the carpet in a large, clean area (like a garage or the room itself if empty) and transfer your measurements.
Use a chalk line to mark your cut lines on the back of the carpet. With a sharp utility knife and a straight edge, carefully cut the carpet to size. Remember to change your blade often, as a dull blade can snag and tear the carpet fibers.
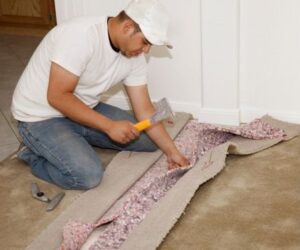
Step 4: Apply the Adhesive
Starting at one end of the room, roll back half of the cut carpet. Carefully read the instructions on your commercial carpet adhesive. Some require a specific “open time” or “set time” to become tacky before you lay the carpet.
Using the notched trowel recommended by the adhesive manufacturer, spread a thin, even layer of glue onto the exposed concrete. Hold the trowel at a 45-degree angle to ensure consistent coverage. Avoid applying the adhesive too thickly, as it can seep through the carpet seams.
Step 5: Lay and Secure the First Half
Gently roll the carpet back over the freshly applied adhesive. Work from the center outwards to smooth out any air bubbles or wrinkles. Avoid dragging the carpet, as this can create ridges in the glue.
Once the first half is in place, use a 75-100 lb. carpet roller to press it firmly into the adhesive. Roll the entire section in both directions (width and length) to ensure a strong bond.
Step 6: Complete the Second Half
Fold back the remaining unglued half of the carpet over the section you just installed. Repeat the process: apply the adhesive to the bare concrete, carefully roll the carpet into place, smooth it out, and use the heavy roller to secure it.
 Step 7: Trim the Edges
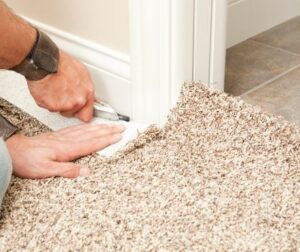 Step 7: Trim the Edges
With the entire carpet glued down, use your utility knife to trim the excess carpet along the walls. Press the carpet firmly into the corner where the floor meets the wall and use that crease as your guide. Take your time to ensure a clean, straight cut for a professional finish.
Frequently Asked Questions (FAQs)
Can you install commercial carpet on uneven concrete?
It is not recommended. Installing carpet over uneven concrete will result in a poor finish and can cause the carpet to wear out prematurely. Bumps and dips will be visible and can become tripping hazards. Always use a self-leveling compound to create a flat, smooth surface before starting your commercial carpet installation.
What adhesive works best for concrete floors?
The best choice is a high-quality commercial carpet adhesive designed specifically for direct glue-down applications on concrete. These adhesives are formulated to bond strongly to porous surfaces and withstand heavy foot traffic. Always check the product label to confirm it is suitable for your carpet type and for use on concrete. Your flooring supplier can often recommend the best product for the carpet you’ve purchased.
Do I need a pad under my commercial carpet?
For most commercial glue-down installations, a pad is not used. Commercial carpets are designed with a durable backing that provides stability and some cushioning. The direct glue-down method ensures the carpet stays put in high-traffic environments and prevents wrinkling or buckling.
How long do I have to wait before walking on the new carpet?
This depends on the adhesive you use. Generally, you should limit foot traffic for at least 24 hours to allow the adhesive to cure properly. Heavy furniture and equipment should not be moved onto the carpet for at least 48-72 hours. Refer to the adhesive manufacturer’s instructions for specific curing times.