
Installing hardwood floors can transform a space by adding elegance and increasing property value, but it requires precision and knowledge to execute successfully. This guide provides you with essential steps, expert tips, and important considerations to ensure your hardwood floor installation is seamless and durable. Whether you’re a DIY enthusiast or looking to oversee a professional job, our comprehensive instructions cater to all skill levels. From selecting the right materials to mastering installation techniques, embark on your flooring journey confident in achieving a stunning, long-lasting finish. Discover how to lay the foundation for beauty and durability today.
Key Highlights
- Proper preparation, including choosing hardwood type and gathering tools, ensures successful installation.
- Acclimating hardwood flooring to the room’s conditions prevents future warping and gaps.
- Nail-down and glue-down methods have distinct advantages for different hardwood types and environments.
- Finishing touches like sanding and sealing enhance floor durability and appearance.
- Regular maintenance with proper methods preserves hardwood floor’s functionality and aesthetics.
Preparing for Hardwood Floor Installation
Before diving into the actual installation process, it’s crucial to thoroughly prepare for installing your hardwood floors. This preparation includes making informed decisions between solid and engineered hardwood types, which affect the durability and installation method. Additionally, gathering the right tools and materials ensures a smooth process once you start installing. Proper preparation paves the path for a successful installation and long-lasting hardwood floors that enhance your home. As you proceed, remember that the choices you make today can significantly affect the performance of your wood floors in the future.
Choosing Between Solid and Engineered Hardwood
When deciding between solid and engineered hardwood, consider the unique benefits each offers. Solid hardwood offers an authentic look and allows for multiple refinishes over its lifetime, making it a traditional favorite for hardwood flooring. Conversely, engineered hardwood is designed with multiple layers, making it more resistant to moisture and temperature changes. This flexibility makes it ideal for diverse environments, including basements. Your choice will largely depend on the location of your floor installation, budget, and personal preferences. Both options offer beautiful aesthetics and durability when properly maintained.
Gathering Essential Tools and Materials 
To ensure a smooth hardwood installation, gather all necessary tools and materials beforehand. Essential tools include a nail gun, saw, tape measure, and a level. You’ll also need materials like hardwood planks, glue, and spacers. Having these on hand streamlines the process, minimizing interruptions. Make sure your subfloor is clean and level before starting, ensuring a solid foundation for your hardwood. Properly gathering materials ahead of time is vital to a successful hardwood floor installation, allowing you to focus on the actual process without unnecessary delays.
Steps for Installing Hardwood Floors Effectively
Embarking on the journey of installing hardwood floors requires a strategic approach to ensure the best results. We’ll cover essential aspects like properly acclimating your hardwood and planning your flooring layout. Each step plays a critical role in achieving a flawless hardwood installation. Acclimating helps prevent future issues like warping, while a well-thought-out layout guarantees aesthetic consistency and structural stability. You’ll find in-depth insights into these topics, guiding you towards a seamless and successful floor installation.
- Gather necessary tools and materials.
- Acclimate hardwood planks to the room temperature and humidity.
- Prepare the subfloor by cleaning and ensuring it’s level.
- Lay down a moisture barrier or underlayment if required.
- Measure and mark the layout for the hardwood installation.
- Cut the first row of planks to fit if necessary.
- Install the first row of hardwood planks, leaving space for expansion.
- Stagger plank seams for a natural look.
- Continue installing subsequent rows using the staggered pattern.
- Use spacers to maintain consistent expansion gaps.
- Cut planks to fit as needed around corners and obstacles.
- Secure planks with nails or adhesive according to flooring type.
- Install the last row of planks, trimming to fit snugly.
- Remove all spacers and install baseboards or moldings.
- Clean the floor to remove dust and debris.
- Inspect the finished floor and make necessary adjustments.
- Apply a protective finish if required.
- Allow the floor to settle before moving in furniture.
- Properly Acclimating Your Hardwood
Before you install hardwood, it’s vital to properly acclimate your flooring to the room’s environment. Acclimating involves leaving the hardwood flooring in the room where it will be installed for several days. This process allows the planks to adjust to the room’s moisture levels, temperature, and humidity, reducing the risk of warping or gaps post-installation. Remember, acclimation is a fundamental step, especially when dealing with engineered hardwood, to ensure the longevity and durability of your flooring.
Planning Your Flooring Layout
 Planning Your Flooring Layout
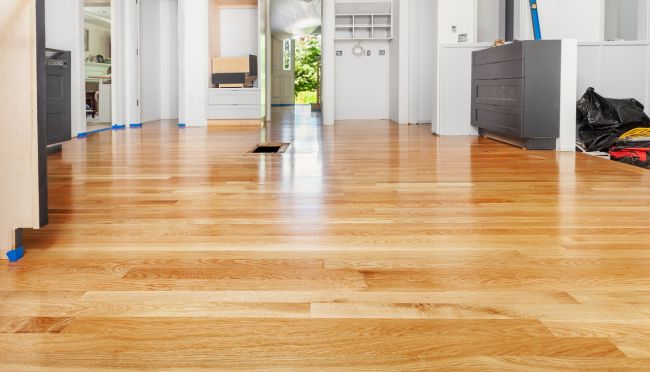
A well-executed flooring layout plan is essential for a cohesive and aesthetically pleasing result. Begin by determining the direction in which to lay the planks, usually parallel to the longest wall. This not only makes a room appear larger but also maximizes the material usage and efficiency of the installation process. Consider any focal points in the room that may dictate changes in your layout. Laying out your wood floors thoughtfully ensures a balanced and visually appealing floor installation, reflecting your meticulous attention to detail.
The Installation Process: Step-by-Step Guide
| Step | Description |
| 1. Gather Materials | Collect all necessary materials including hardwood planks, underlayment, nails, glue, and tools like saws, hammer, tape measure, and chalk line. |
| 2. Acclimate Hardwood | Allow the hardwood flooring to acclimate to the room temperature and humidity for 48-72 hours. |
| 3. Prepare Subfloor | Ensure the subfloor is clean, dry, level, and tightly secured. Patch any holes and sand uneven areas. |
| 4. Install Underlayment | Lay down the chosen underlayment material, ensuring it covers the entire floor space without gaps or overlaps. |
| 5. Plan Layout | Measure the room and plan the layout of the hardwood planks. Consider starting from the longest and straightest wall for alignment. |
| 6. Cut Planks | Use a saw to cut the planks to the required size, ensuring to leave room for expansion gaps along the walls. |
| 7. Install First Row | Align the first row with the guideline, face side up, and leave an expansion gap at the wall. Nail or glue the planks as necessary. |
| 8. Continue Installation | Continue laying rows of planks, making sure to stagger the joints at least 6 inches from each other to add structural integrity. |
| 9. Secure Planks | Use a flooring nailer or stapler for tongue-and-groove planks, ensuring a secure fit without gaps between boards. |
| 10. Cut Around Obstacles | Cut planks to fit around obstacles such as corners, heating vents, and transitions with adjoining rooms. |
| 11. Finish Installation | Complete the installation by fitting the last row snugly, trimming boards as necessary to accommodate expansion gaps. |
Transforming your space with wood floors begins with understanding the detailed steps of installation. We’ll highlight the essentials of starting with the first row of planks, laying the foundation for your entire flooring project. It also explores varying installation methods, aiding you in choosing between nail-down and glue-down options. With this knowledge, you can effectively install your hardwood floors and enhance the aesthetic and functionality of your home.
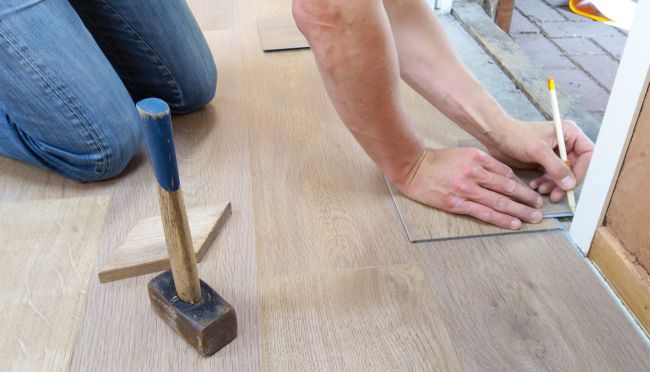
Installing the First Row of Flooring
The first row of hardwood planks sets the tone for the entire floor installation. Begin by placing a spacer against the wall to maintain a consistent expansion gap, crucial for the wood’s natural movements. Carefully lay the first row parallel to the longest wall, ensuring the tongue side faces the wall. Secure each piece meticulously with either nails or glue, depending on your chosen installation method, ensuring alignment and stability. This initial step is fundamental, ensuring your hardwood floor installation progresses smoothly and consistently.
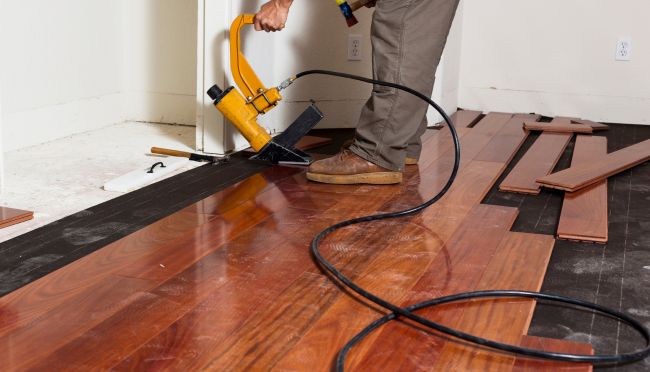
Nail-Down versus Glue-Down Installation Methods
Choosing between nail-down and glue-down methods directly impacts your floor’s durability and feel. Nail-down installation involves nailing the planks to the subfloor, providing sturdy support ideal for thick, solid hardwood. In contrast, glued-down installation is often used for engineered hardwood, with glue providing a more flexible bond suitable for areas where moisture changes. Both methods require precise execution and selection depends on factors like wood type, subfloor condition, and environmental considerations, ultimately affecting the longevity and performance of your hardwood flooring.
Finishing Touches and Maintenance
The final stages of hardwood floor installation involve applying the finishing touches and learning how to maintain your new flooring. These steps are crucial for ensuring the longevity and appearance of your floor. We’ll provide guidance on everything from precise finishing applications to comprehensive care strategies, helping you protect your investment. Understanding these elements will help you keep your floor both functional and visually stunning, maintaining its value for years to come.
The Final Stages of Hardwood Floor Installation
- Applying the finish coat
- Performing a final inspection
- Cleaning the floor surface
- Installing baseboards and trim
- Learning how to maintain your flooring
- Understanding the manufacturer’s guidelines
- Establishing a regular cleaning routine
Applying the Finishing Touches
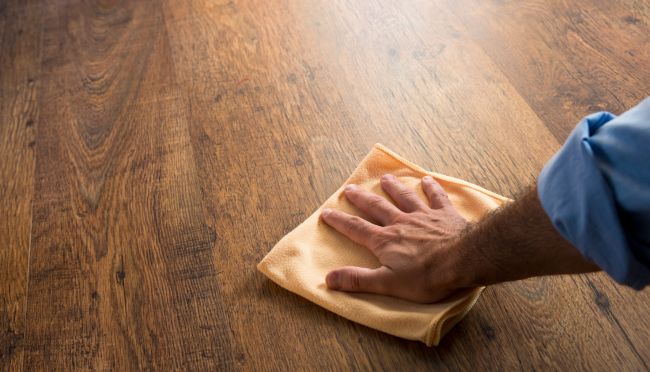
After successfully installing your hardwood floor, applying the finishing touches elevates its aesthetic appeal and durability. Finishing includes sanding the floor for a smooth surface and applying a protective sealant. This sealant, often polyurethane, acts as a barrier against moisture, minimizing damage. Edge finishing is equally important to blend the floor with the walls seamlessly. The choice of finish, whether glossy or matte, should complement the room’s decor. Attention to these details not only enhances the look but also extends the floor’s lifespan.
Caring for Your New Hardwood Floor
Proper care and maintenance of your new hardwood floor are vital steps to ensure its longevity. Regular cleaning using appropriate methods prevents dirt and moisture from compromising the finish. Avoid excess water that can seep through edges and cause damage. Placing mats near high-moisture areas like bathrooms helps in protecting the flooring. Additionally, using furniture pads prevents scratches, maintaining the floor’s pristine condition. Routine maintenance sustains both the functionality and beauty of the hardwood, preserving it as a core feature of your room.
Troubleshooting Common Installation Issues
Even with thorough preparation, installation issues can arise when you install hardwood flooring. We’ll tackle two common problems: gaps and creaks. Understanding why these issues occur is crucial for maintaining your floor’s integrity and appearance. You’ll learn how to troubleshoot and resolve gaps that can disrupt the aesthetic continuity and creaks that affect structural stability, ensuring your hardwood flooring stands the test of time.
Dealing with Gaps and Creaks
Gaps in hardwood flooring often result from improper acclimation or a misjudged room installation layout. These gaps, appearing between planks, can be minimized by ensuring the subfloor is level and dry before installation. Additionally, acclimating planks to the environment’s humidity and temperature helps reduce these problems. Creaks, on the other hand, typically occur when there’s movement between the floor and subfloor, often due to an uneven surface. Mitigating creaks involves securing the subfloor and ensuring the planks are installed properly with room for minimal movement.
FAQs
What are the key considerations when installing hardwood floors?
Installing hardwood floors requires precision and knowledge. Key considerations include selecting the appropriate hardwood type, gathering essential tools, and choosing between nail-down and glue-down methods, all of which ensure a seamless and durable installation.
How does acclimating hardwood flooring prevent future issues?
Acclimating hardwood flooring helps prevent warping and gaps by allowing the wood to adjust to the room’s moisture levels and temperature before installation. This process involves leaving the flooring in the installation area for several days.
What are the benefits of choosing engineered hardwood over solid hardwood?
Engineered hardwood provides greater resistance to moisture and temperature variations due to its multi-layered construction, making it suitable for diverse environments like basements. Solid hardwood offers a classic appearance and can be refinished multiple times.
What tools and materials are essential for a hardwood floor installation?
Essential tools for hardwood floor installation include a nail gun, saw, tape measure, and level. Necessary materials include hardwood planks, glue, and spacers. Preparing your subfloor by ensuring it is clean and level is also crucial.
How do you properly maintain newly installed hardwood floors?
Proper maintenance involves regular cleaning to prevent dirt and moisture damage. Avoid excess water when cleaning and use furniture pads to prevent scratches. Place mats near high-moisture areas, maintaining both the functionality and aesthetics of the flooring.